This post is for those who have requested a "how to" for painting wood floors.
Ebony and Natural Stained Checker Board
Under the bench is a striped black and white distressed painted rug.
These are just a few that I have done myself. I show them so you can get an idea on design.
SUPPLIES:
1- Paint Thinner/ Varnish Stripper
2- LOTS of Paper Towels and old T-shirts
3- Metal Spackle Knife/ Scraper
4- Face Mask (and proper ventilation, fresh/dry air flow)
5- Disposable Rubber Gloves (several)
6- Hand Sander or appropriate sanding method for the size of space you are doing. I use a 120 grit sand paper - not too strong to scratch the wood but strong enough to move the varnish off.
(I use an orbital hand sander for a "rug" or smaller area)
7- Vaccum and Tack Cloths
8- Paint - I use Benjamin Moore Metal and Wood Enamel
(Talk to your local paint specialists for a recommendation if this paint doesn't come in the color you desire) OR Floor Stain.
I like Low Lustre rather than High Gloss - depends in the look you want
9- Polyurethane for Floors
10- Large T square - a must for measuring!
IMPORTANT NOTE: Oil based paints can go on top of water based paint but NOT water based paint over oil. If you are repainting or using two paint colors.
PREPARE:
This job is messy and dusty so if you have items you wish to protect move them out of the area or cover them in sheets. (speakers and electronics should be covered)
Where protective gear such as gloves, safety goggles and clothes that can be destroyed.
For a "rug":
Tape off the outside border of your rug with a good brand of blue tape. I stay on seams of the wood where I can. It's easier to measure out and paint straight lines.
Follow the directions on your paint thinner can to remove the existing stain or varnish.
Use your metal spackle knife to scrape as much of the varnish off as possible.
IMPORTANT NOTE:
THIS PART WILL MAKE OR BREAK YOUR RESULTS.
Strip and sand the area so it is very dull and clear of stain.
Once your wood is dull and clear of varnish.
Vacuum and wipe away dust with tack cloths to free the area of dust particles.
Use a pencil or chalk to measure out your pattern.
For squares or diamonds it's best to decide how many squares you want across your floor.
Always start in the middle and end on a full or 1/2 square. Take your width measurement and divide it by how many squares you want.
Then do the legnth measurement and divide your desired number of squares into it.
You most likely won't be painting an exact 16" square (example). One way might be 15 3/4 inch and the other side might be 17 inches. The end result will look like squares.
I am going to show you my foyer project in pictures:
Foyer floor all stripped of varnish:
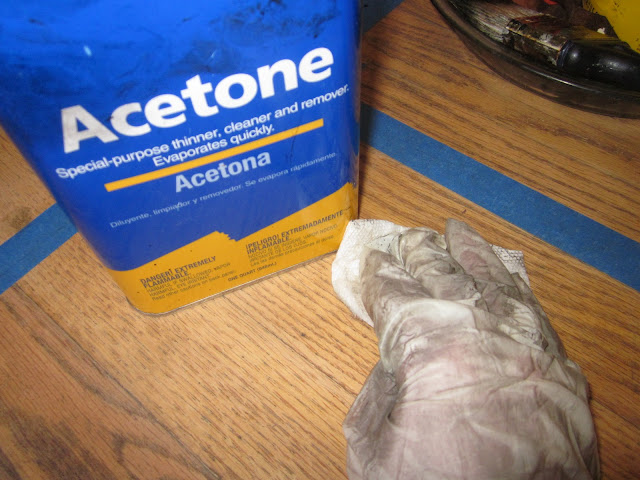
Once the floor was striped I used acetone to wipe the area after the sanding and vacuuming.
I used an old pie dish to scoot my stain a long with me - for drips.
I taped off my pattern and put a taped X in the boxes that were not getting stain.
Clean each square really well before staining.
Brush the stain on in your squares.
(make sure your tape is on REALLY good by rubbing your finger over the inside edge several times.
Stain will bleed so easy. You will have a little touch up no matter what.
Wipe the stain...
Wait for 24 hours.....
Peel tape slowly.
This is "bleeding" - I used a razor blade as I went along to scrape it up. I also used the acetone to wipe those areas down and to remove any pencil marks.
(I would rather work with paint than stain)
It looks like this.
Now it's time for the top coat. I used a polyurethane in semi- gloss.
Three coats of poly is recommended. I used a brush for the first coat but then I used an applicator on the end of a broom handle. That went much faster.
Follow the instructions on your poly can.
This wasn't the funnest DIY I ever did but I am really happy with the results.
If you are brave enough to try this.... GOOD LUCK!
It's really pretty.


0 comments:
Posting Komentar